Who wouldn’t like to have a photo as funny, as kids are – lets try to make a kid party box!
We will use Adobe Photoshop, Lightroom and big cardboard box!
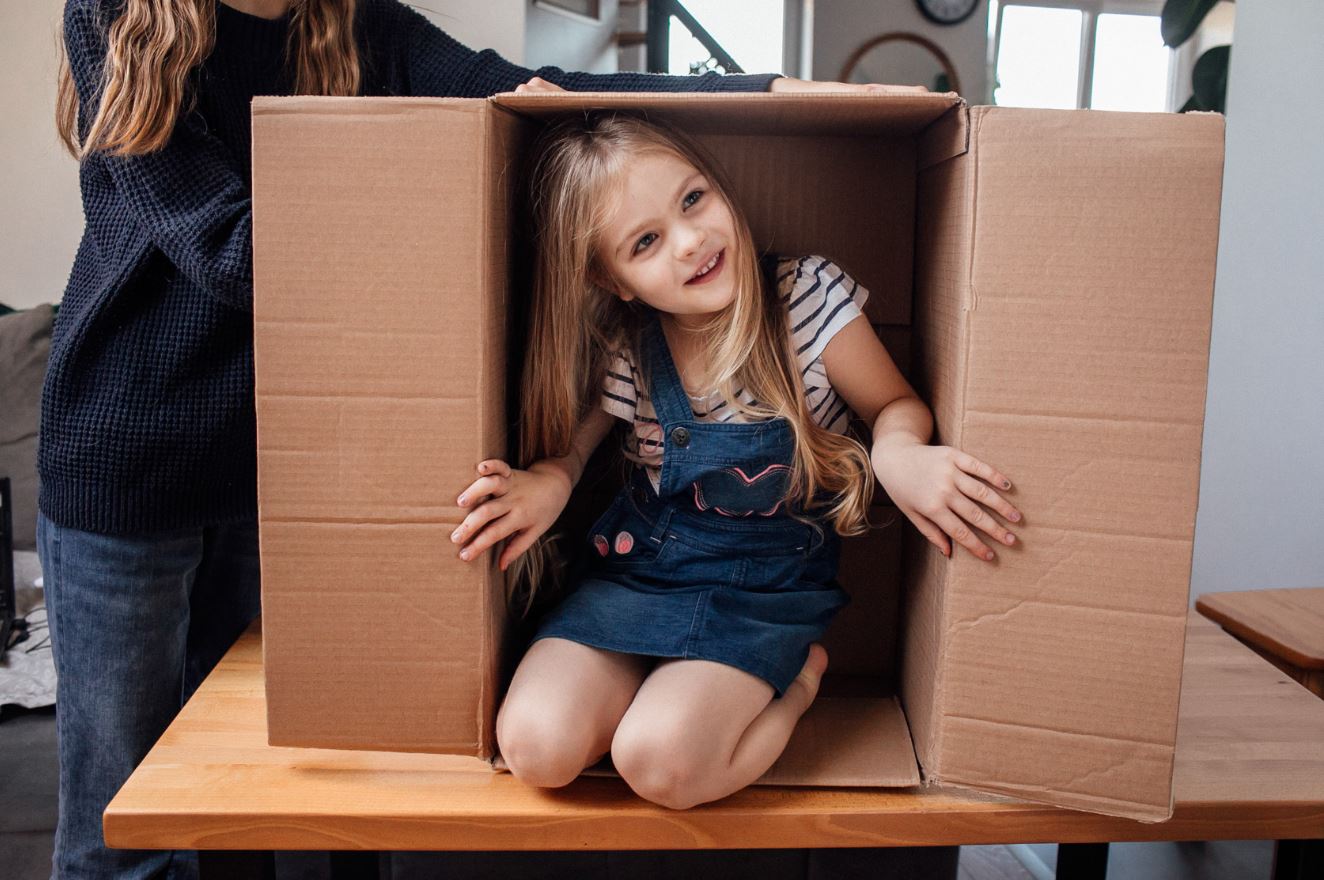
1. Lets take some photos! All you need is cardboard box and kids who would like to play with it!
Remember to place it on a table or a chair, just to have an effect of legs coming out of box.
Don’t forget to take a photo of an empty box, we will need it later!
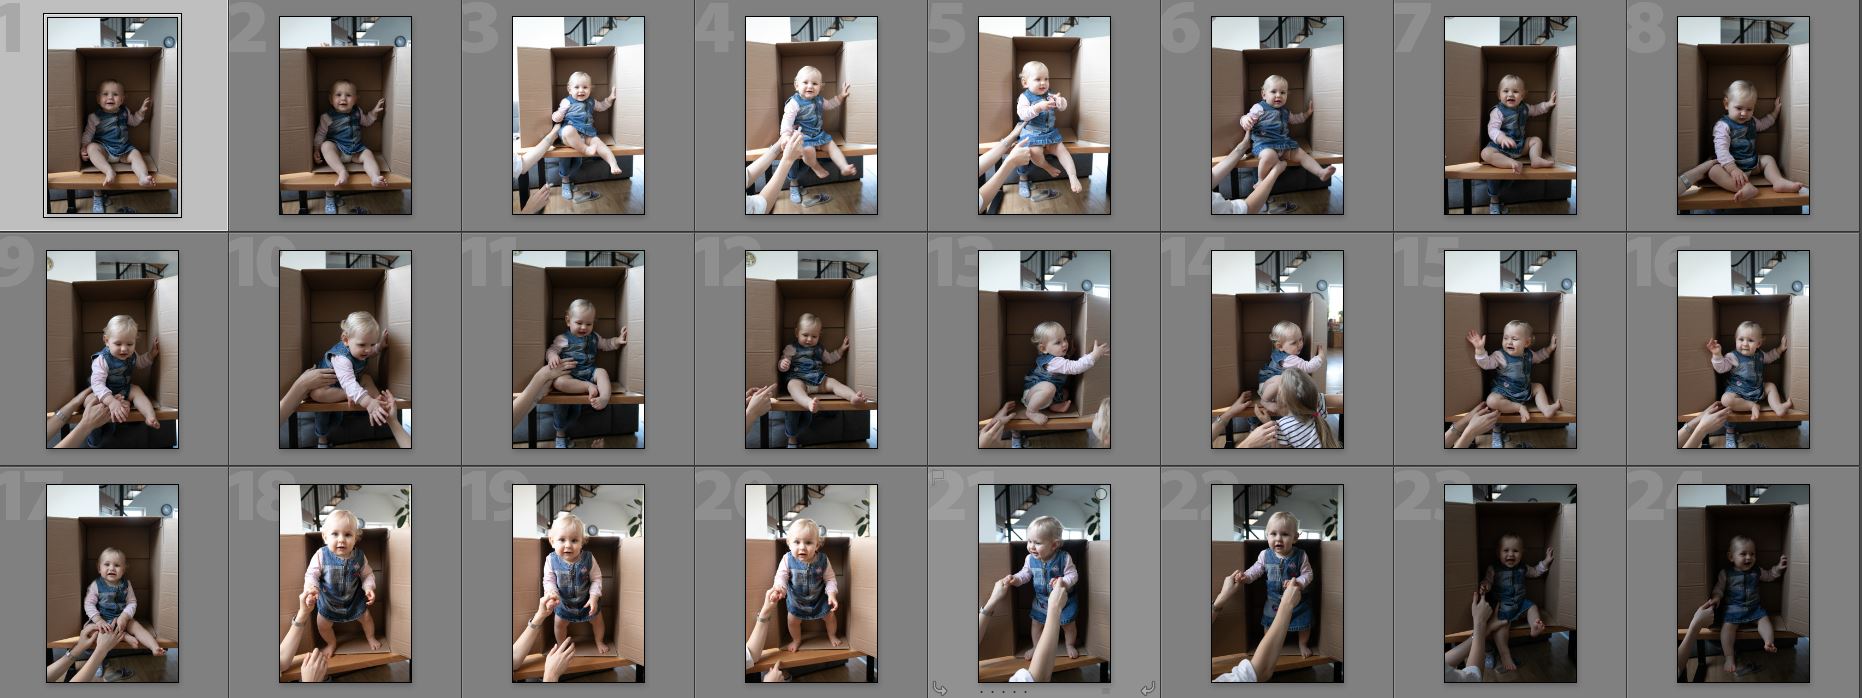
2. Now you need to select about 20 photos, try to choose some of them looking side by side,
up and down, hands up and funny faces
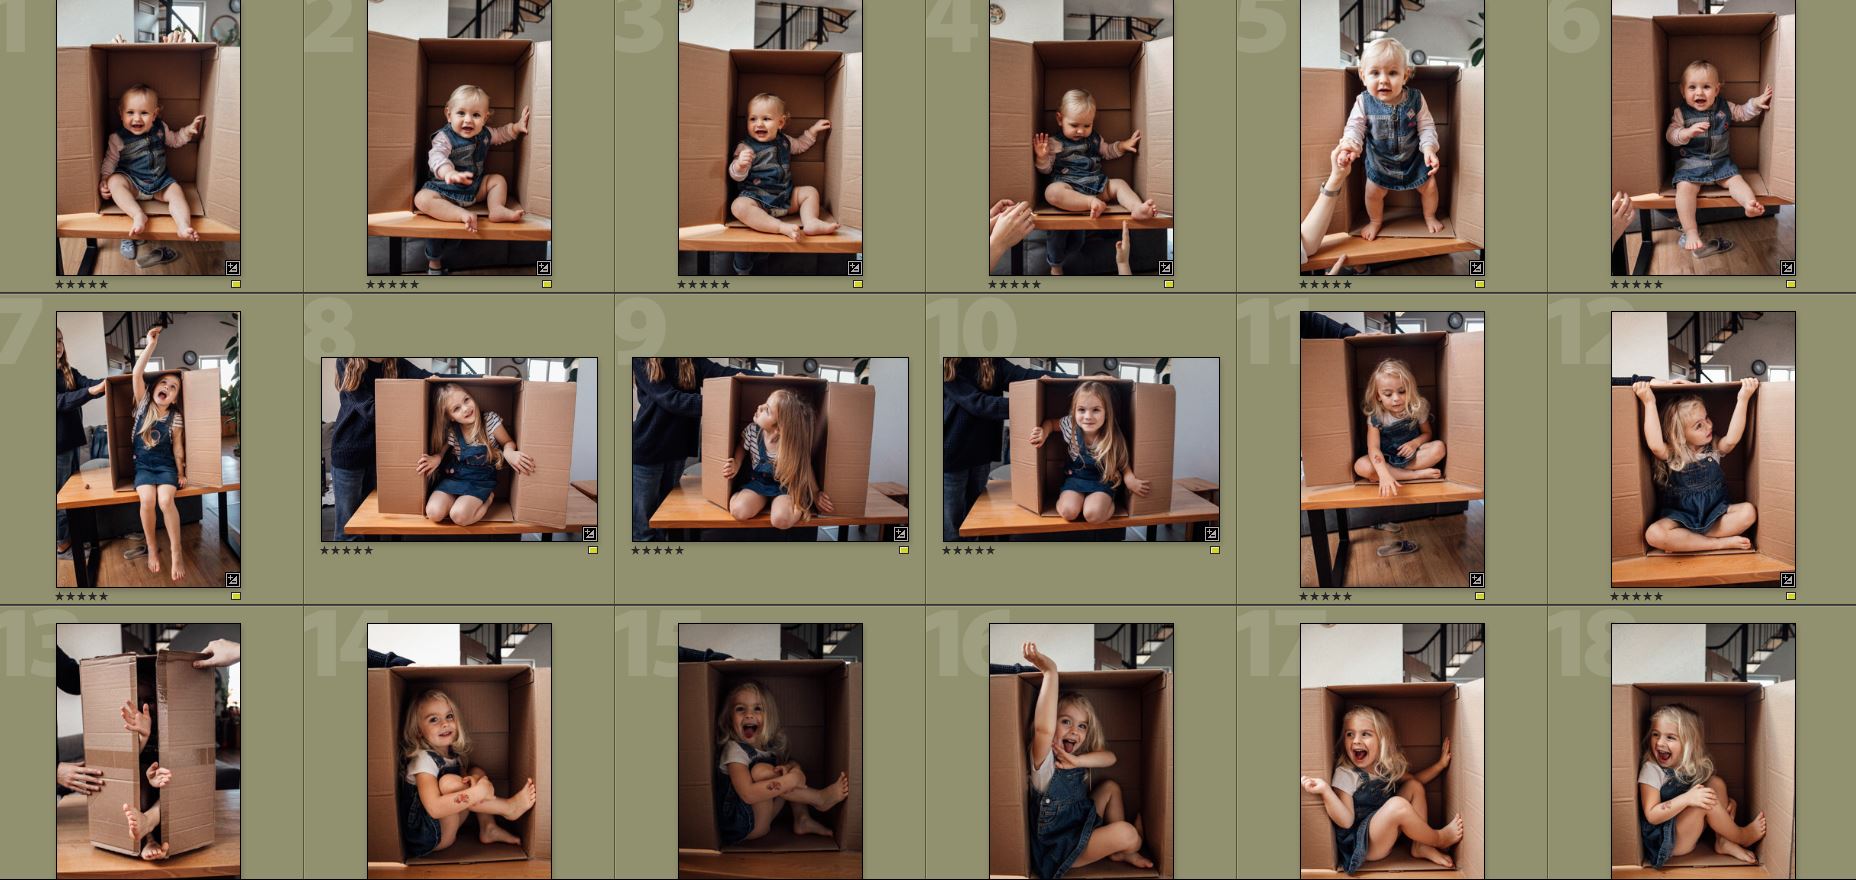
3. Edit selected photos – I did it in lightroom and added some warm filters and brightened them up,
try to make all photos look similar and match each other
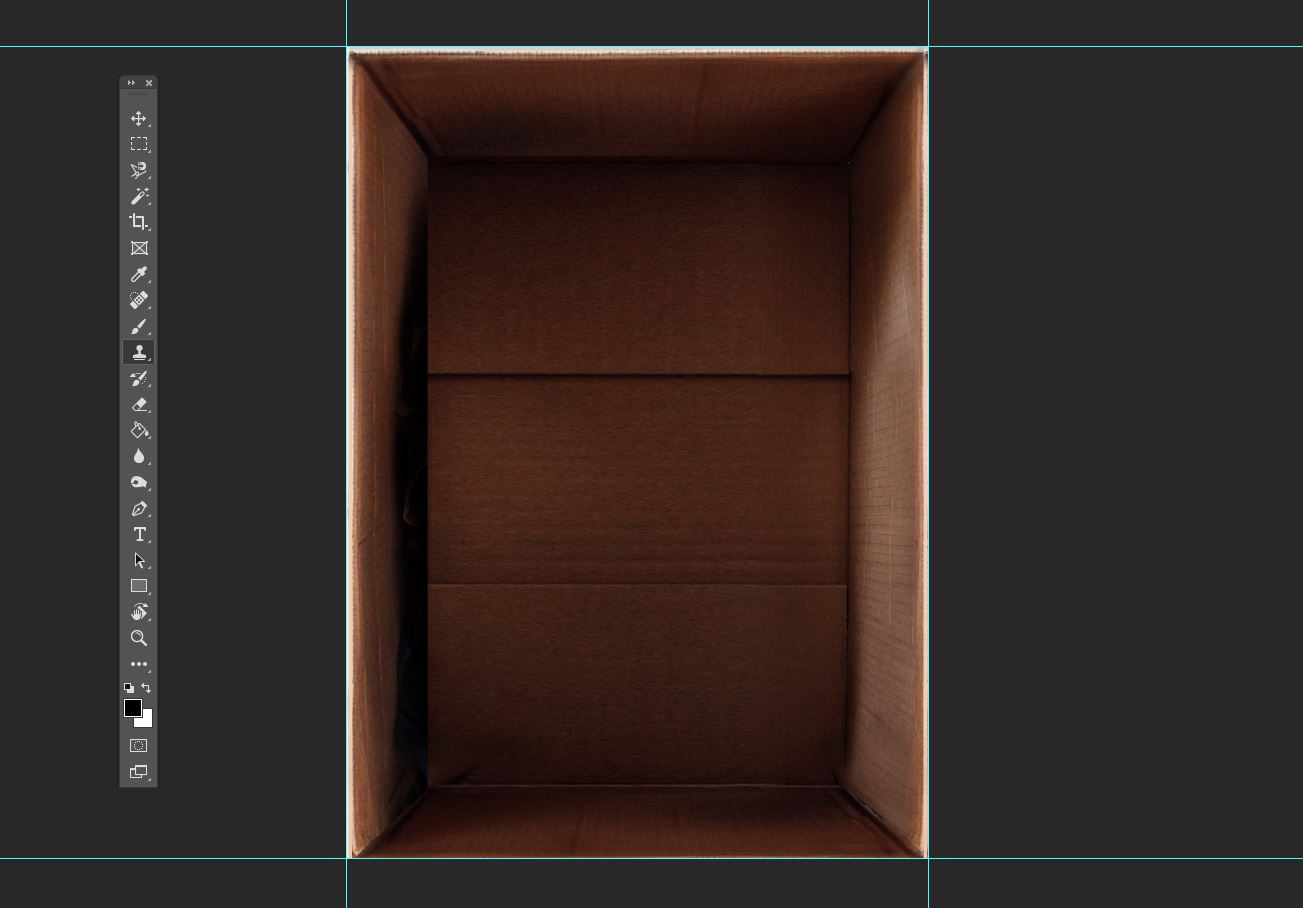
4. Time to go to photoshop! Open your photo with 1 empty box, it will be our basic background.
Clean all of the unwanted shadows, I painted additionally bright line around my box to highlight the borders.
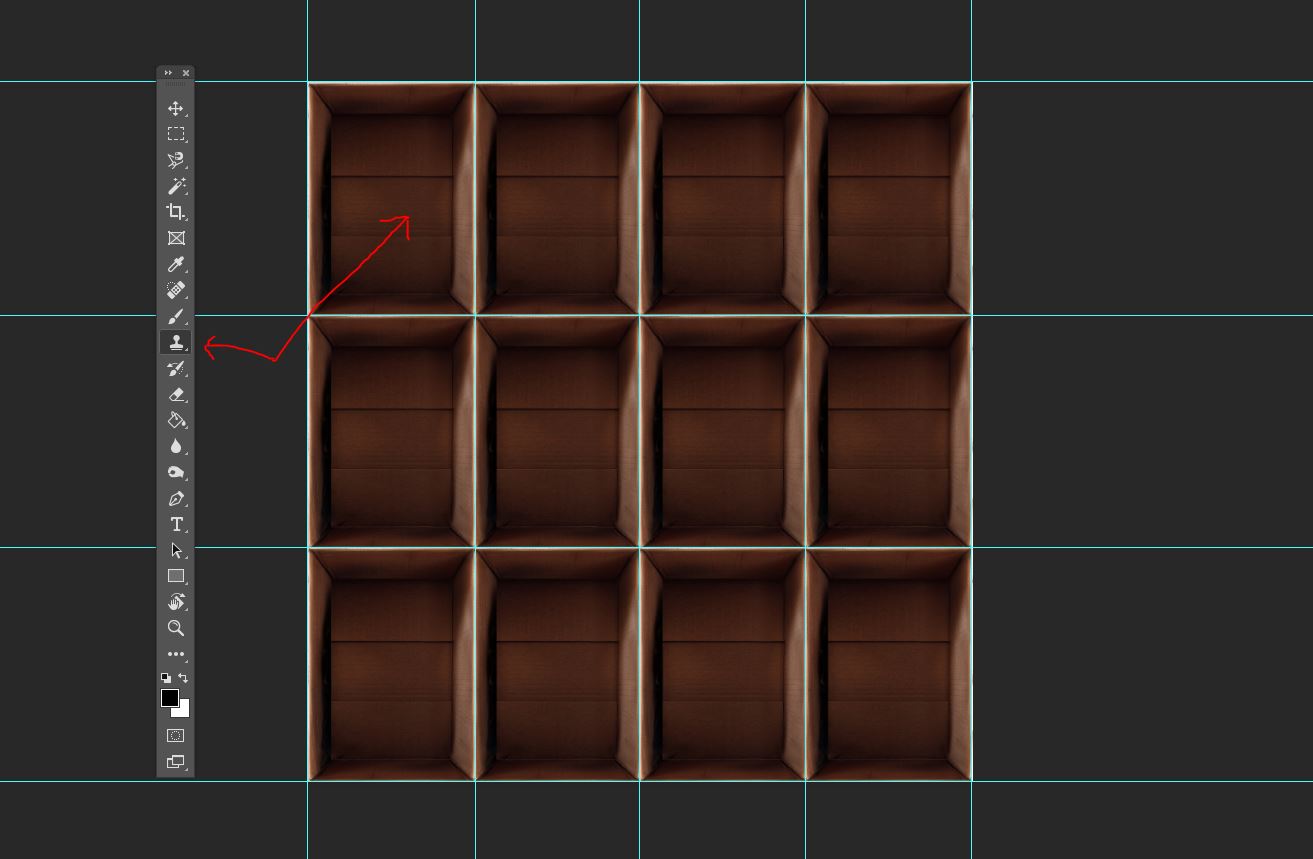
5. When you’re done add help lines (shortcut ctrl+;) and multipy your box 12 times,
basing on the lines of the size of box. You can use stamp to make different boxes unique.
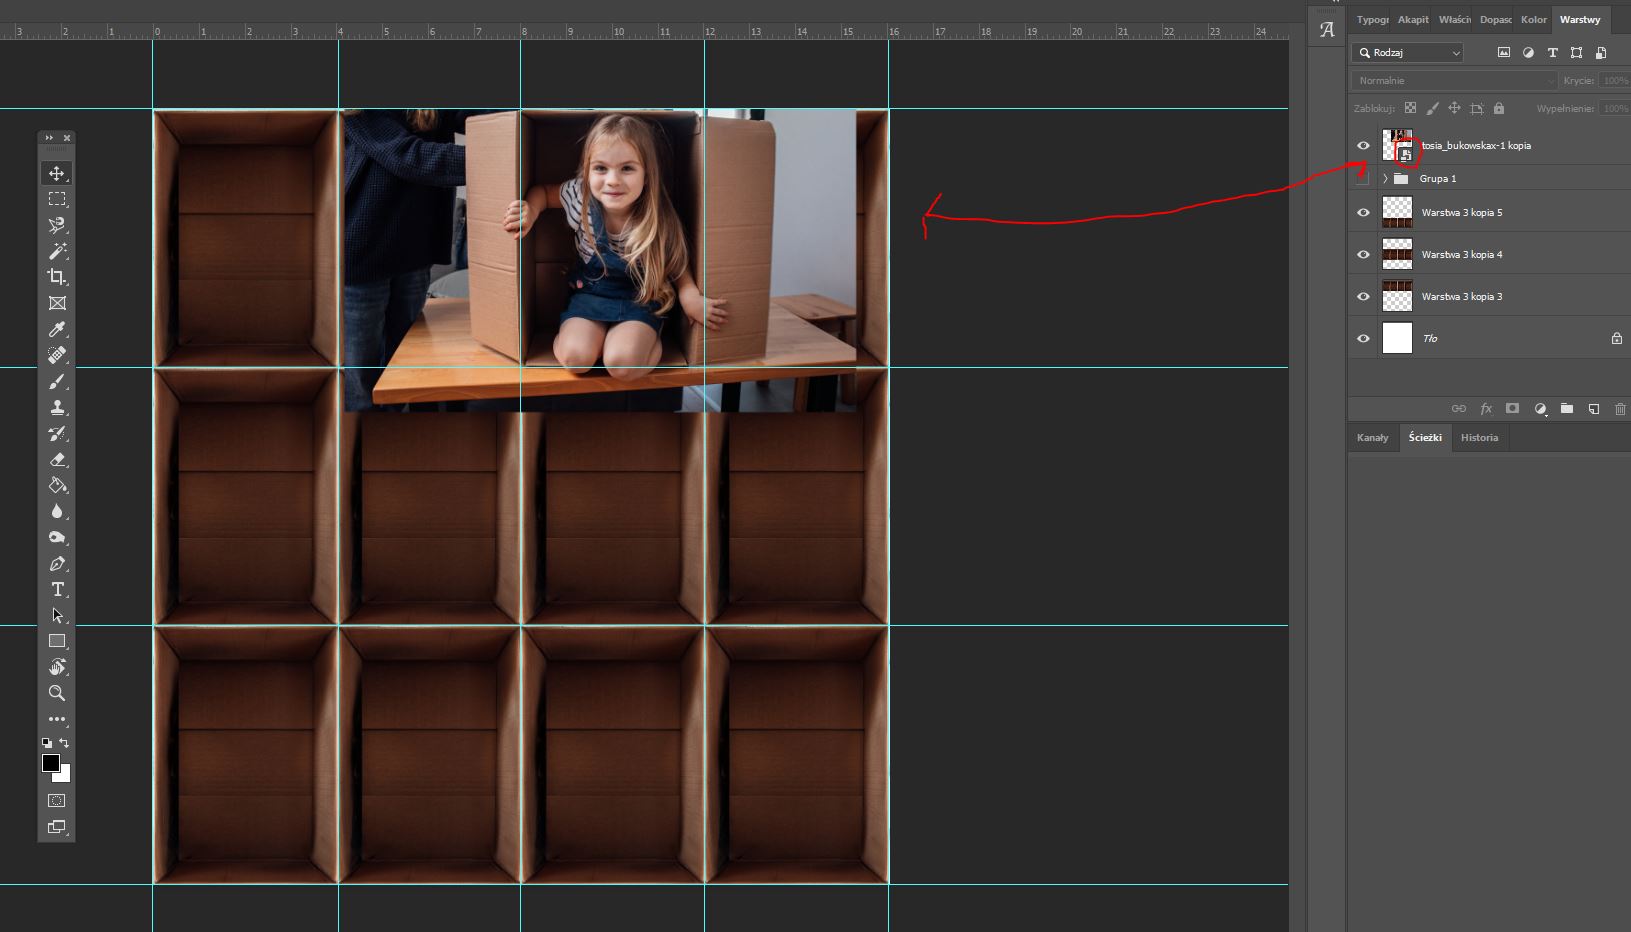
6. Time to add some life into the boxes! Start to insert images as new layers,
remember to have it as intelligent objects (red arrow).
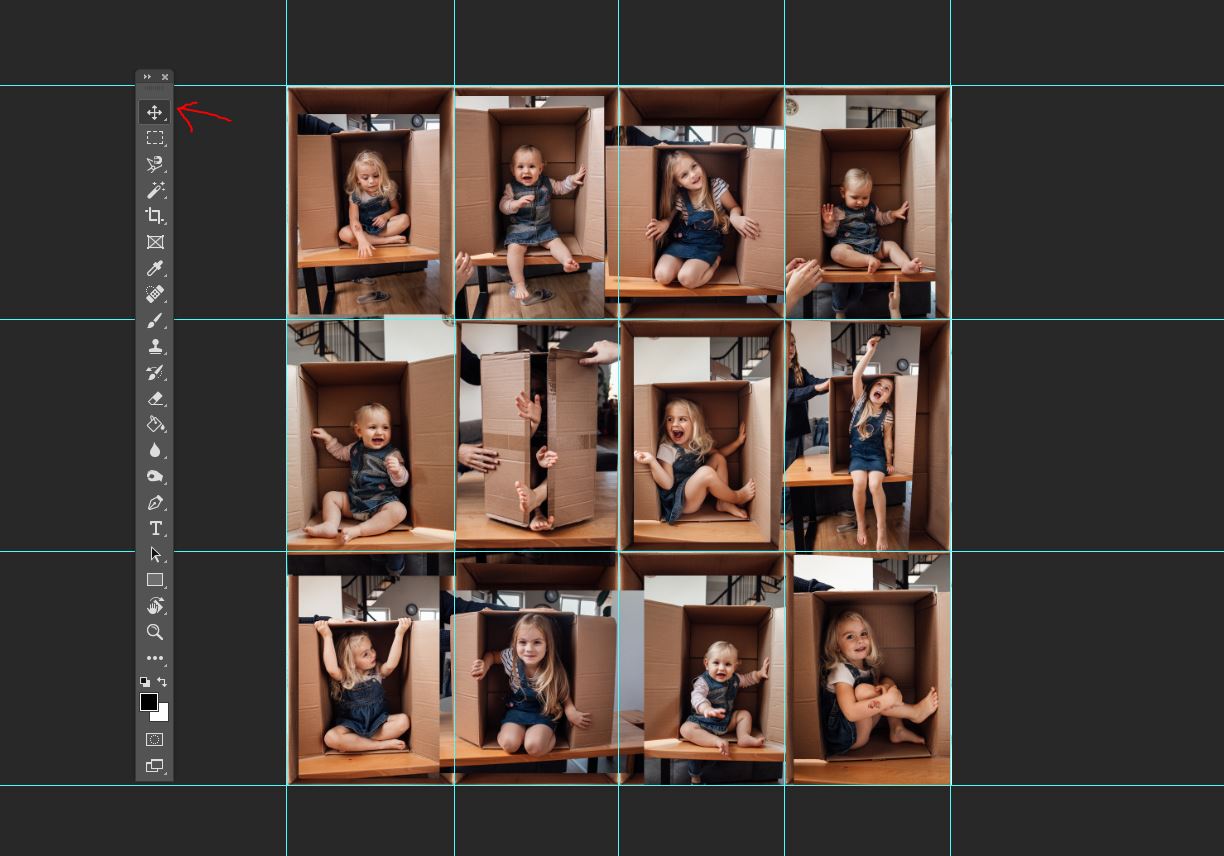
7. Insert images, you think might play with each other, and try to find out the way how to combine them.
Remember to have then uploaded as intelligent objects, otherwise they will decrease the quality while changing sizes.
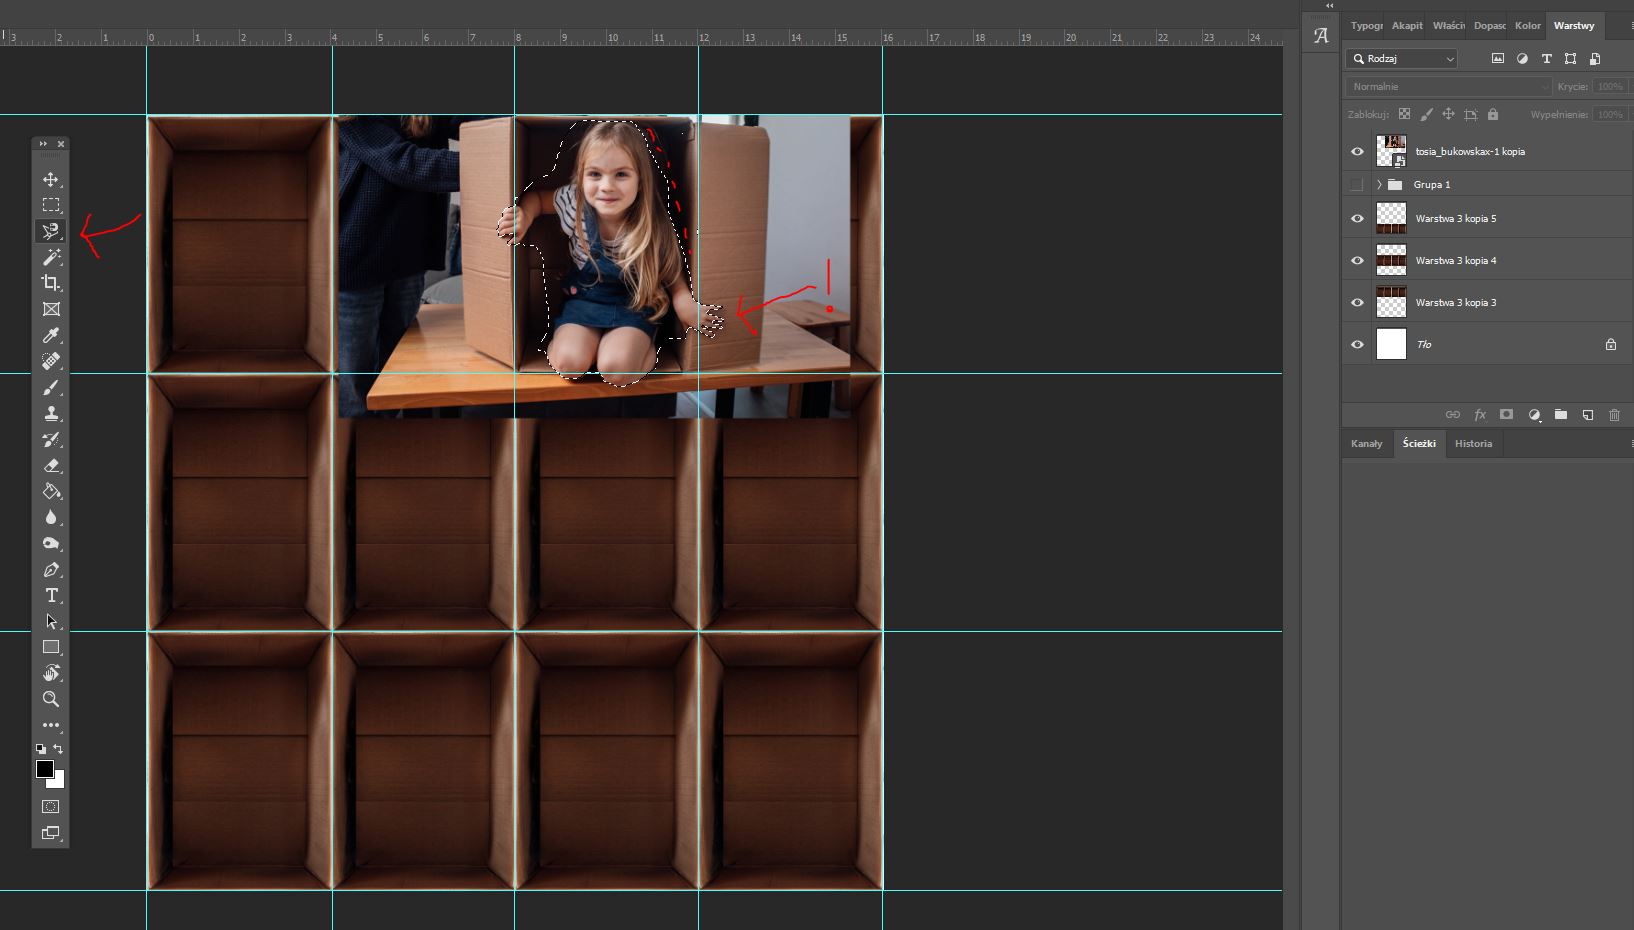
8. Now lets focus on how to adjust one layer to the background. We will use magnetic lasso tool and will make a line around the person, paying extra attention to the parts,
which are going outside the borders of box, such hands and legs.
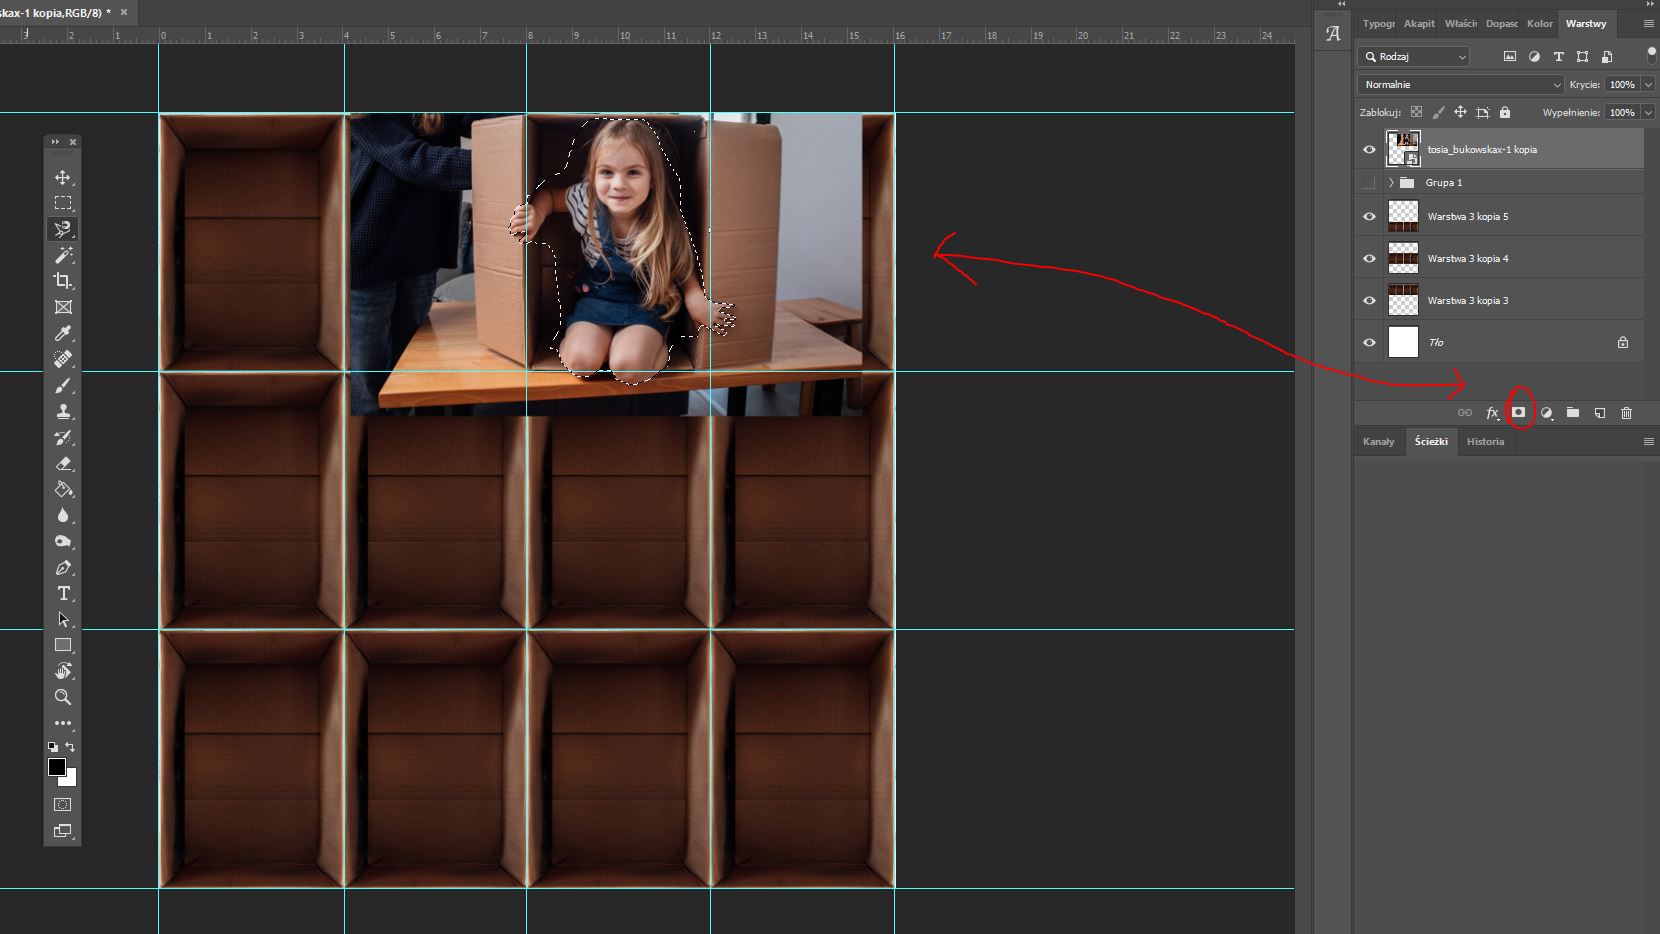
9. Here comes the magical trick – find a button called mask and press it, while the selection done by lasso is still active. Chosen area will stay, and we will have an editable mask to decide what we want to be visible without using an eraser!
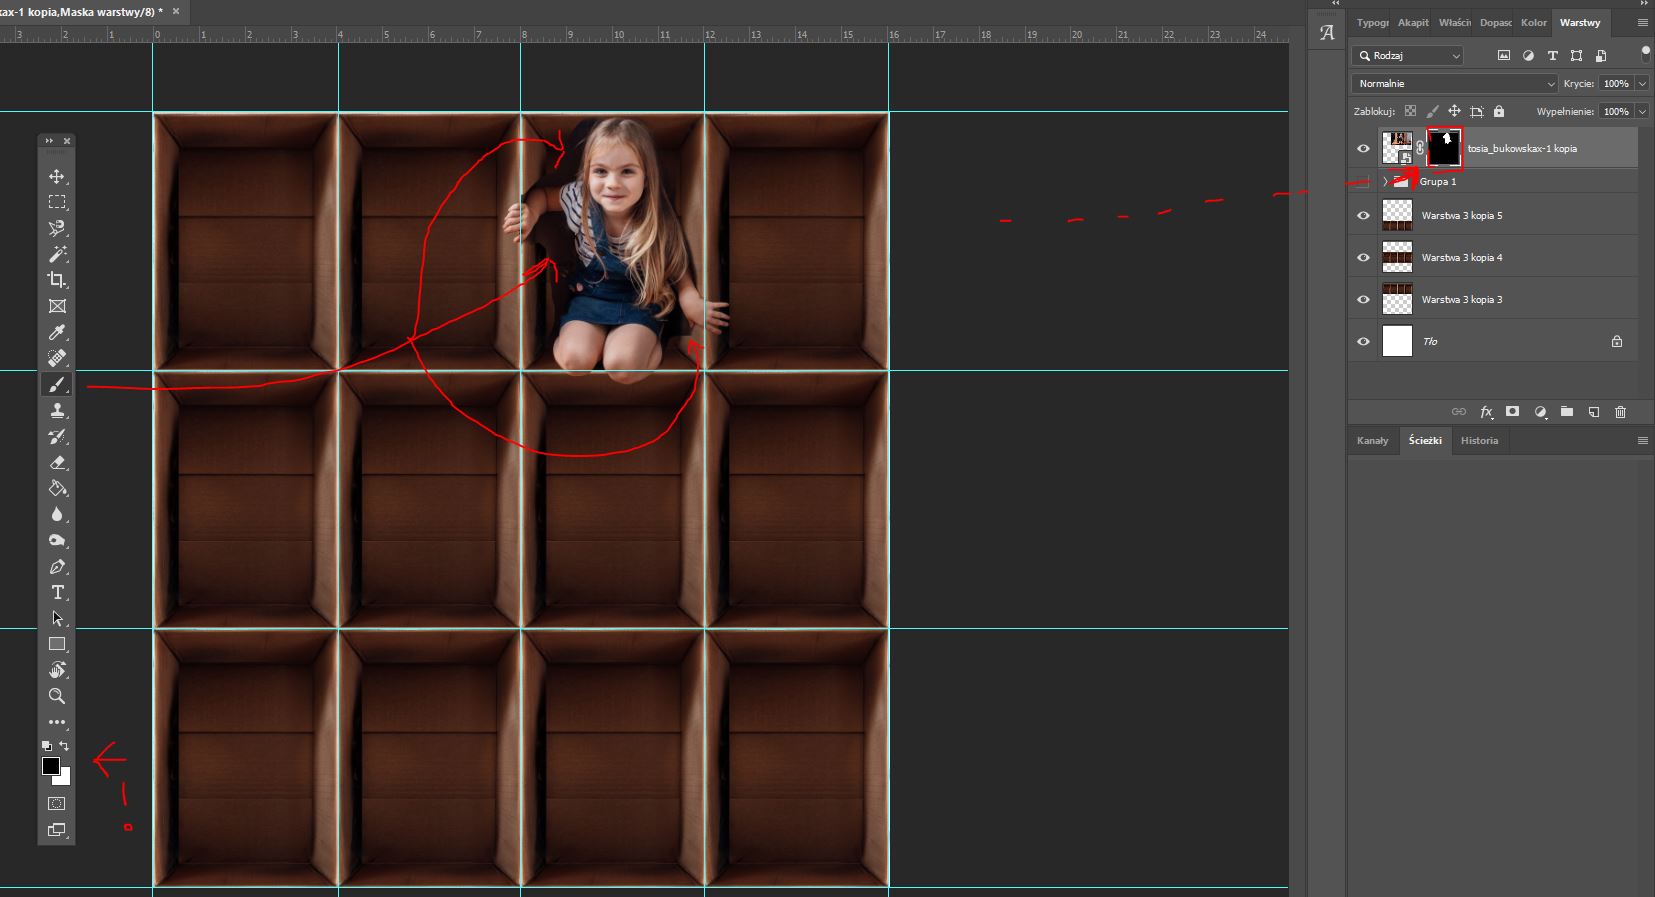
10. On the right you see a new mask, attached to our layer. When you click on it,
you can edit the visibility using a simple brush, marked red on the left.
Using black brush you hide the part, and using white you make it visible.
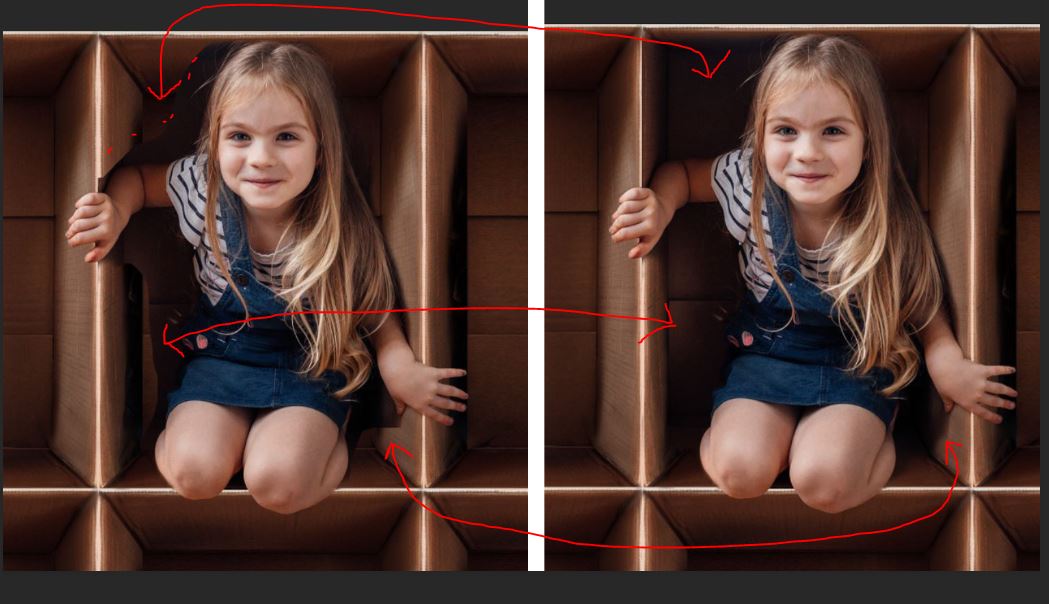
11. On the left you see a layer before using a brush to a mask,
on the right is an effect afterwards.
12. The same routine I did on the next layers,
using only mask and black and white brush.

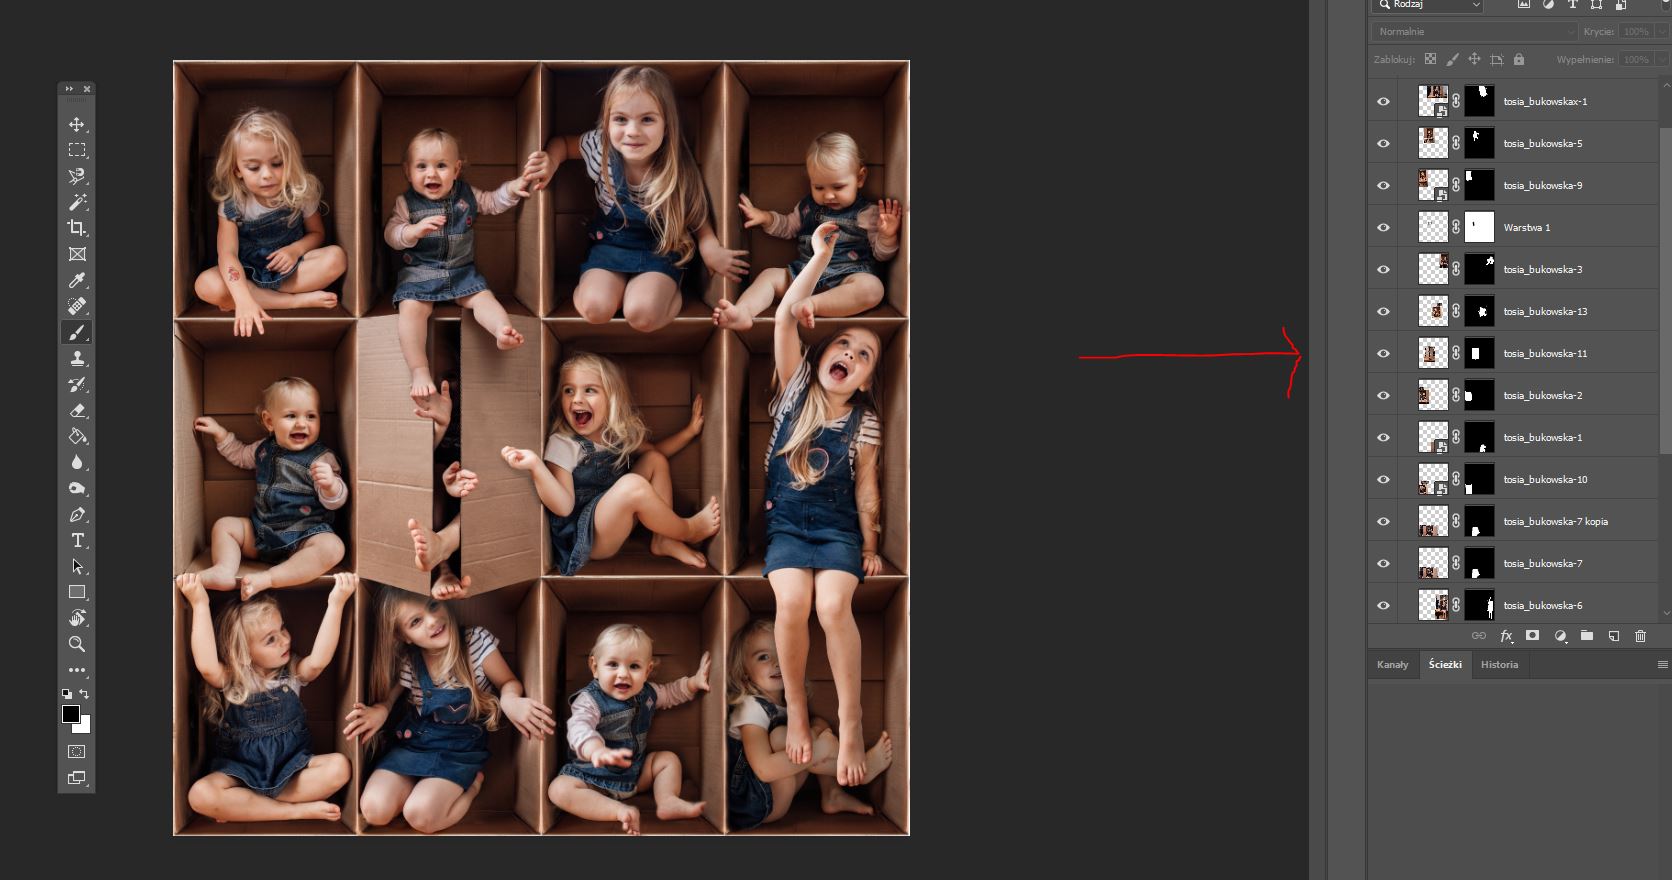
13. To add realistic effect I added a new layer (ctrl+shift+N) and using a brush I painted
some shadows underneath other layers. It really helps the layers pop out!
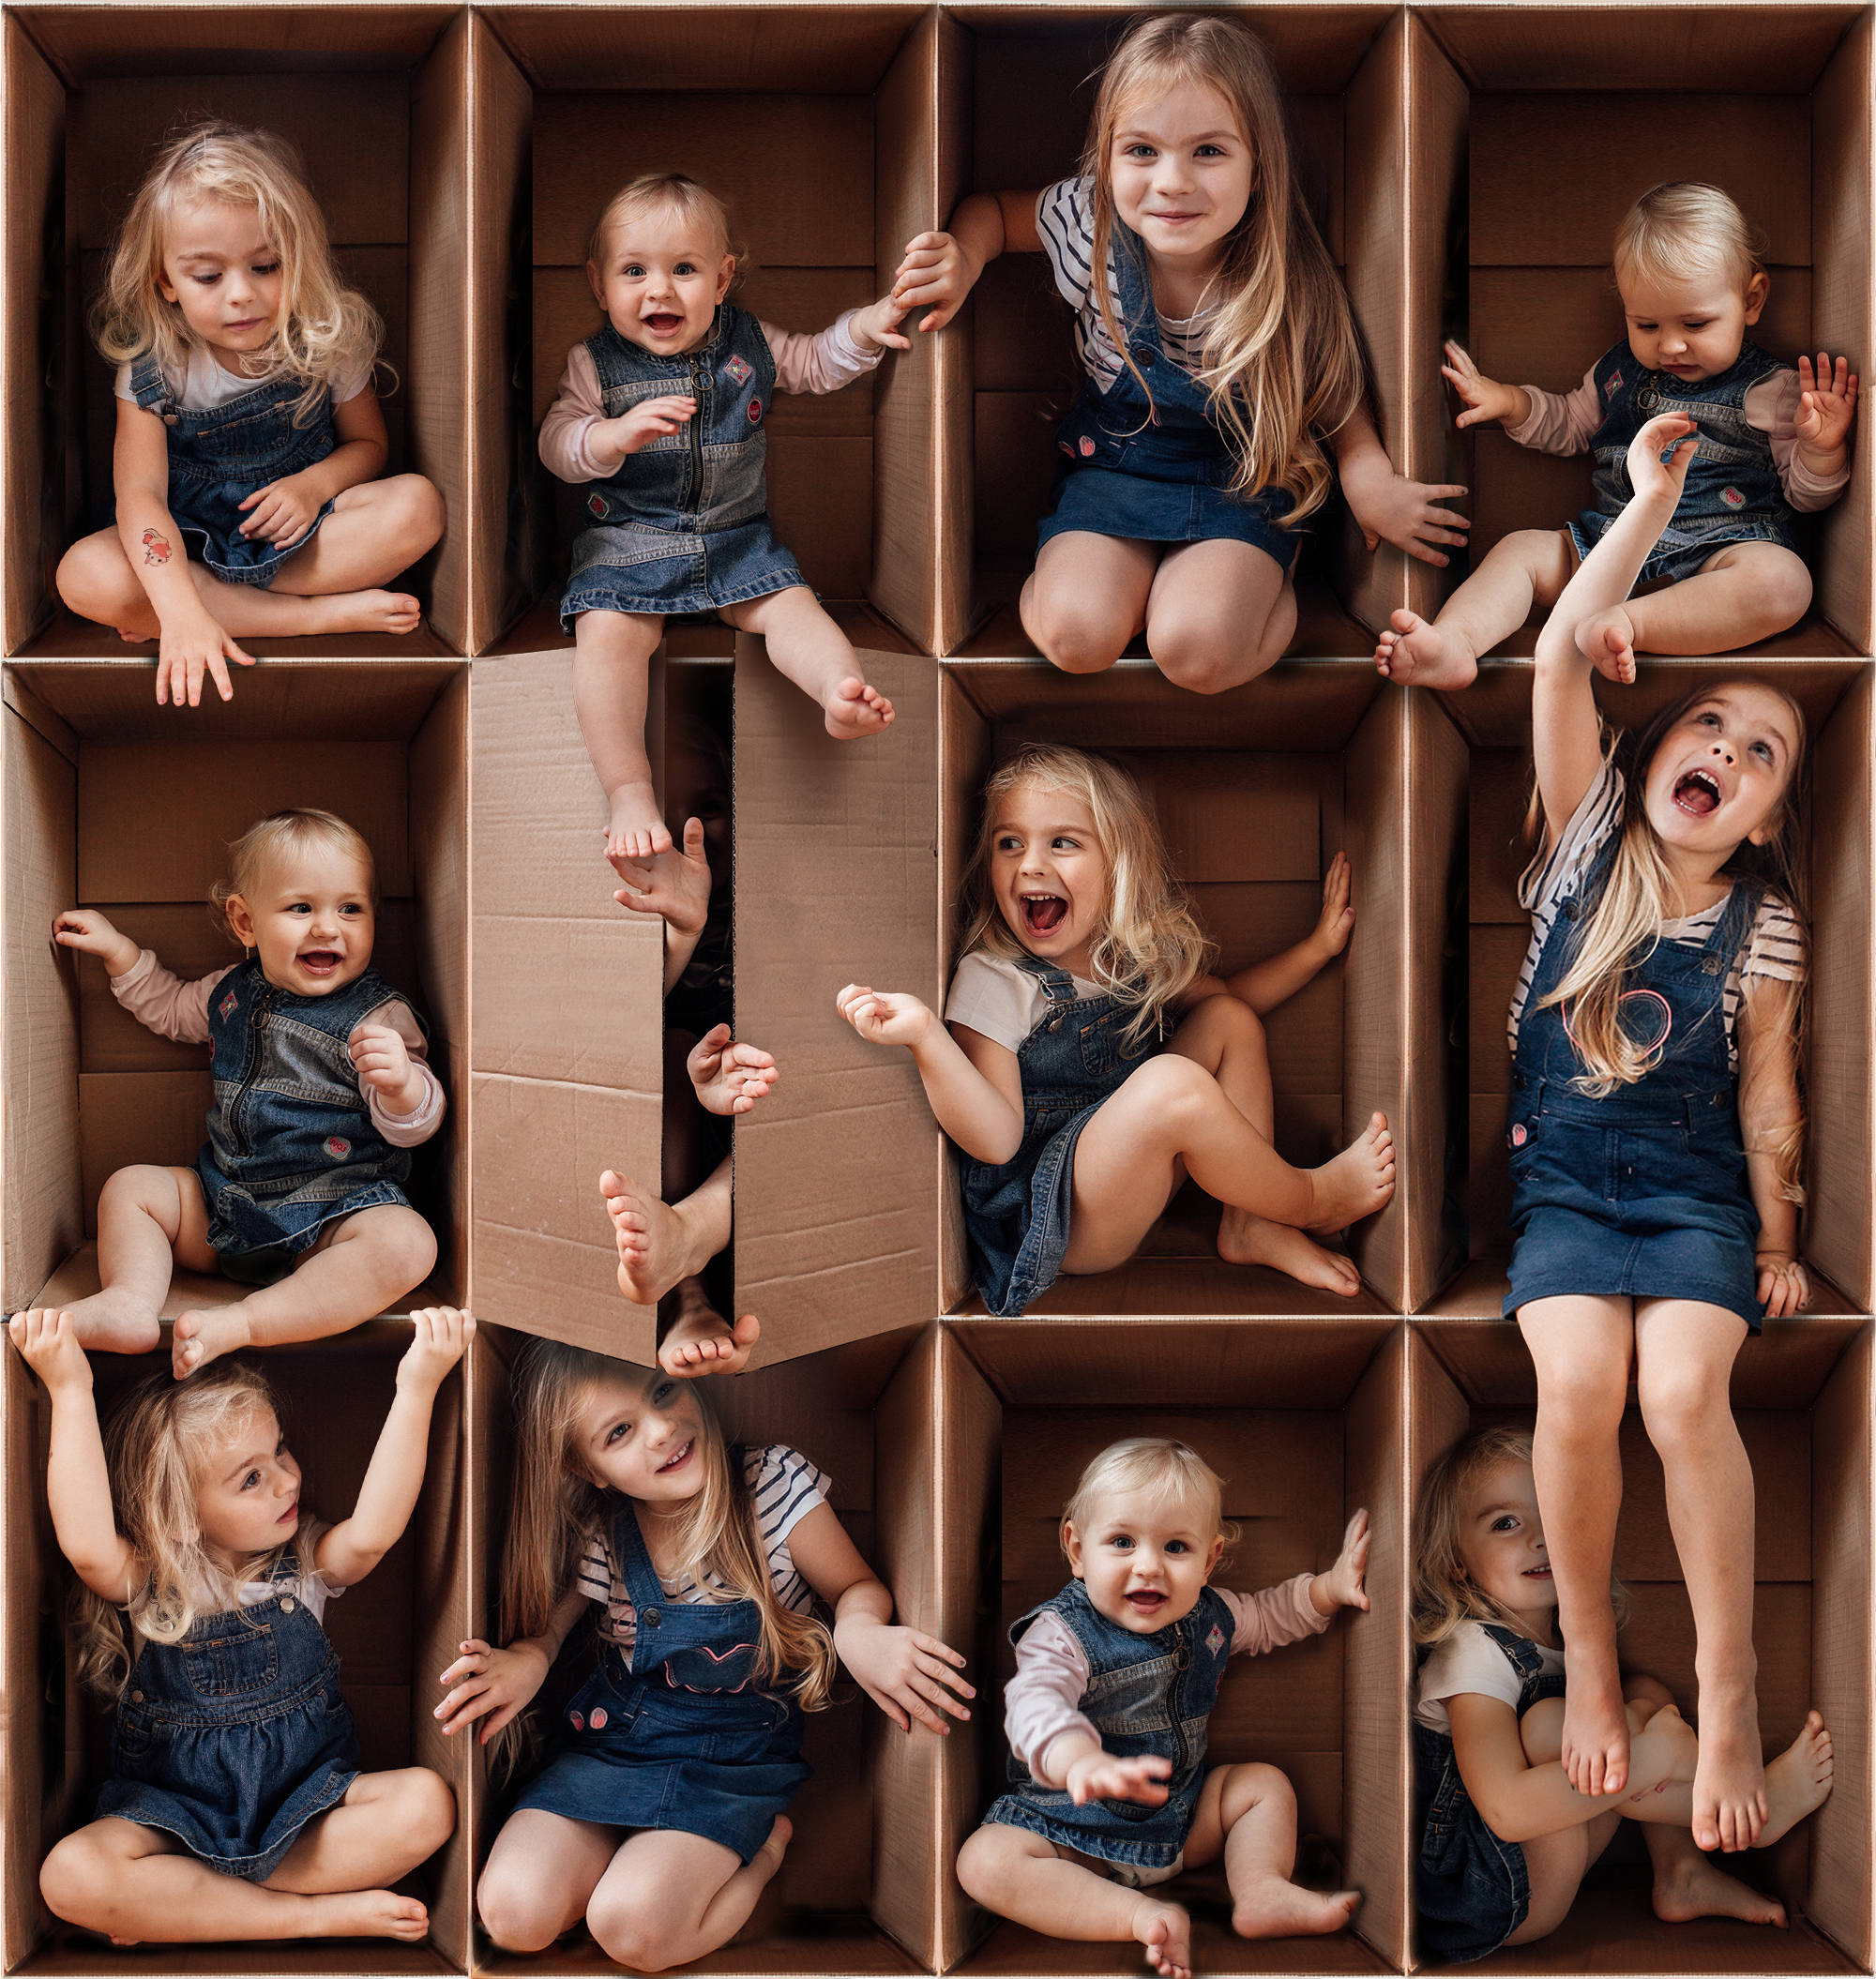
And voilà! Here it is, our new family photo ready to be framed ♡